Booting from a USB on an Odroid N2
Background
My laptop had to be sent away for repairs, and all I had as a replacement device was an Odroid N2 Single Board Computer (SBC). It is decently powerful, but by no means a laptop replacement. Still, I needed any working device I could get, and this was the best thing I had. So before sending off my laptop to the repair centre, I made sure to flash an Armbian ISO to a USB-stick, thinking that was all I needed. All systems boot off a disk or a USB, right? Well yes but actually no…
If you’ve used SBCs like the Raspberry Pi before, you know the standard procedure is to flash the ISO to a microSD card which is then inserted into the Pi. Similarly, Odroid boards use something called eMMC: it is basically just a NAND-flash chip with a connector on the bottom. Very primitive, but also very cheap. Now, since my Odroid board was designed to boot off the eMMC chip, plugging in a USB with an ISO on it did nothing. I had an eMMC-to-USB adapter, and had I bothered to check the box a bit closer and/or recall the last time I had to use this thing, I would have remembered that that’s how it works. But I hadn’t, and the adapter was no good when I didn’t have a working device that I could plug it into.
Step 1: Is there anything to be done?
Given that I wasn’t even greeted by a BIOS screen, I initially assumed that there was no way to get the system running so that I could potentially fix it. Thankfully though, I managed to find an old forum post using my phone which mentioned that the Serial Peripheral Interface (SPI) boot switch might be helpful.
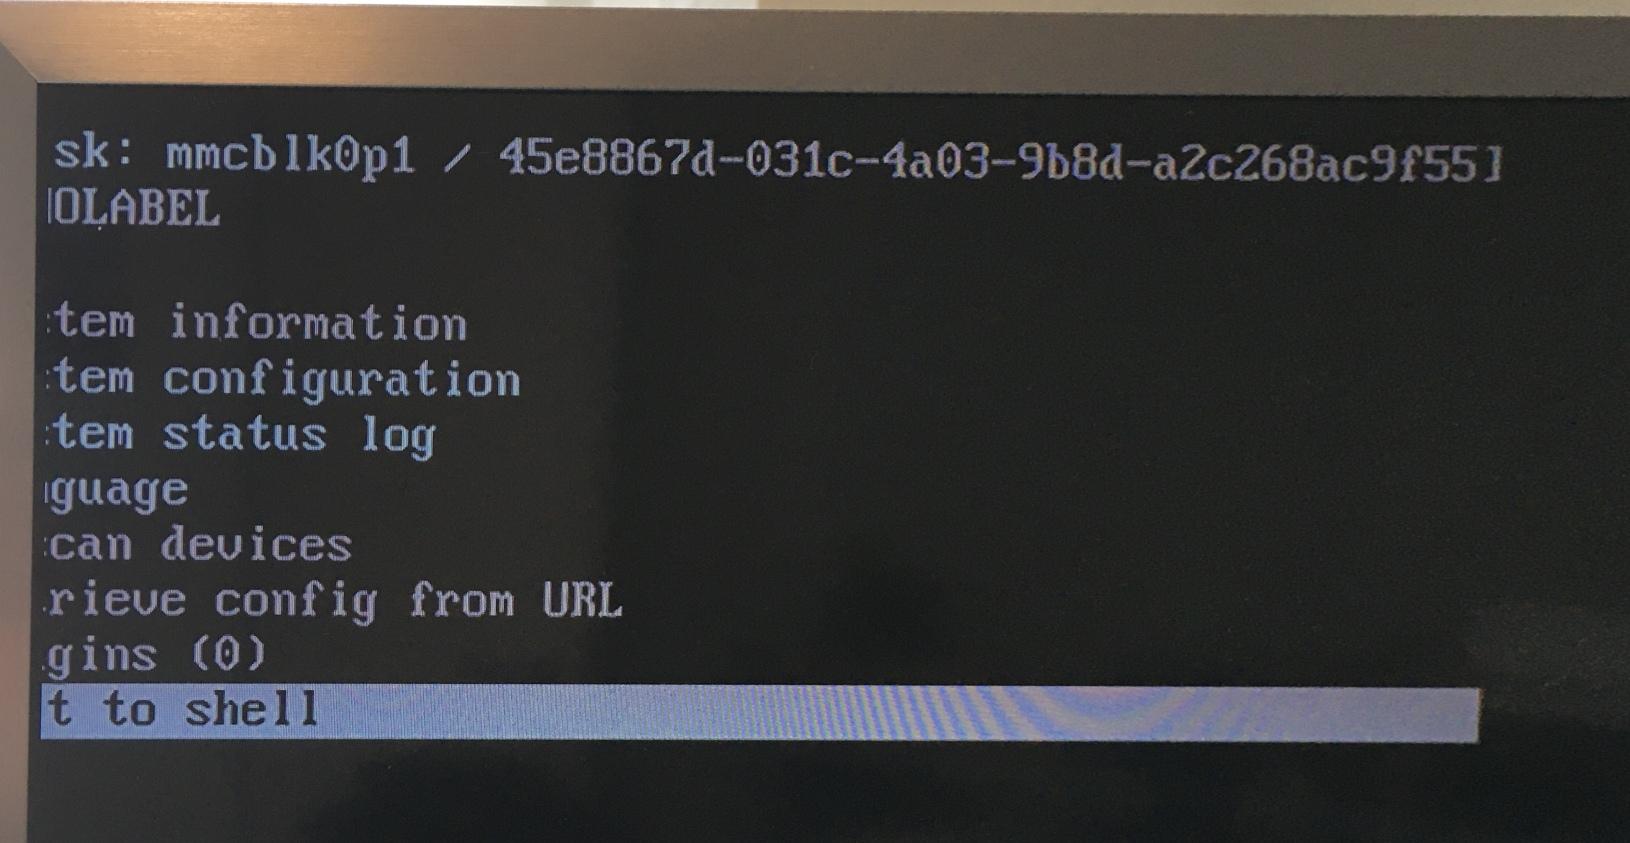
I flicked the switch from “eMMC” to “SPI” and low and behold a simple shell greeted me! The image was not aligned with the display (probably due to the TV in my flat being much newer than the Odroid N2), but still, it was better than no output at all!
As with most command-line interfaces, the first useful thing to do was to try
the help command. In this case, there wasn’t much that suggested being able to
boot a USB stick, but I also noticed that commands like ls were working
despite not being listed in the help output. Hitting tab twice, i.e.
prompting the autocomplete to list the possible options, yielded a much more
complete list of stuff; it seemed like this was a bash shell! Now that I could
definitely work with!
Everyone uses a US keyboard, right?
The next challenge was that, as any fallback shell, the default (and only)
keyboard layout was US ANSI and my keyboard is an ISO board with
Nordic/Scandinavian legends. This is mostly okay, unless you need boring things
like /, *, or any other symbols that might be useful when trying to use a
shell to narrow down paths and directory layouts. Anyway. A reference image of
the US layout on my phone solved everything apart from a heavily reduced typing
speed…
Can has USB?
A quick lsblk before and after plugging the USB stick in confirmed that it was
being detected as /dev/sda. However, when in the BIOS menu, the “Add boot
option” command required the specific paths to the OS image, initrd, and Device
Tree Blob (DTB). Looking this up on the Armbian documentation would clearly have
been too easy: there was no mention of the layout of the ISO. No problem, I
could just mount the USB and look through it, right?
Whelp, mount failed: Device or resource busy. Hmm… Was the USB
automatically mounted somewhere? Running mount without any arguments lists the
mounted devices, so that was my next idea. Unfortunately, reading the output was
somewhat hindered by the left side of the output being cut off by the display
misalignment. But, there was some [...]/dev/sda/[...] stuff in the output.
Could that be it?
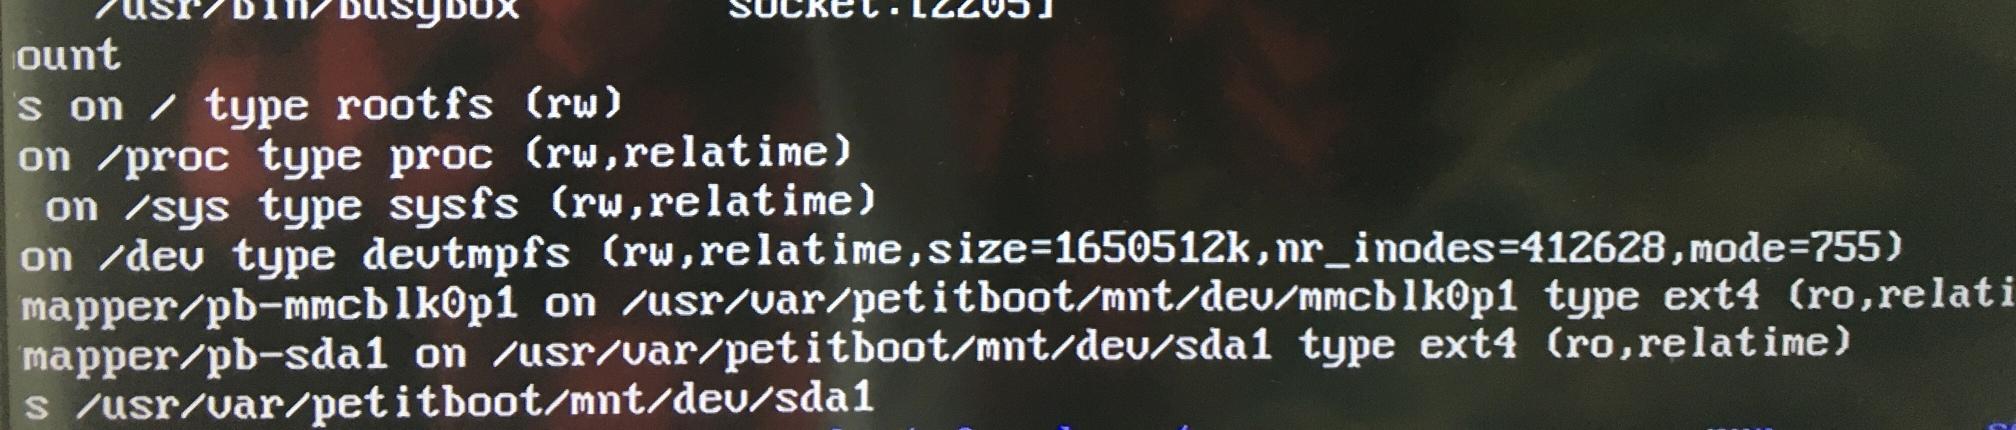
Yes! Deriving the missing parts via tab-completion and then running ls on the
path gave me a root file-system with /boot and all the other goodness I
expected to be there! Now the output alignment was really a problem though: I
needed the absolute path, and it was being cut off when I ran ls… Aha! But
ls -l prepends a bunch of info before listing the paths, meaning the output
was “indented” far enough to be readable! Even better: ls -l also shows where
symlinks point, and there turned out to be a couple of conveniently defined
ones, for example:
/boot/Image -> /boot/vmlinuz-armbian-5.8-aarch64.img
Fantastic!
A custom boot entry
With the relevant absolute paths of /boot written down, and some notes on
typical kernel arguments from the Armbian Wiki, I could finally try to create
and configure a custom boot option for the USB drive:
device:  /dev/sda
image:   /boot/Image
initrd:  /boot/uInitrd
dtb:     /boot/dtb
args:    root=/dev/sda1 console=tty1
Select the boot entry and… Nothing. Not even an error indication or error
message or anything like that… Oh, but at the bottom of the BIOS it said that
g opens the log, so try that?
Error reading dtb: '/boot/dtb' is a directory.
Fair enough.
Some ls calls later combined with grep (after I finally figured out where
the |-key was), I had a precise DTB and could reconfigure the boot option:
device:  /dev/sda
image:   /boot/Image
initrd:  /boot/uInitrd
dtb:     /boot/dtb/amlogic/meson-g12b-odroid-n2.dtb
args:    root=/dev/sda1 console=tty1
Try to select that for booting again and: <hacker voice> I’m in!
Creating a working system
Thankfully, there was enough free space on my USB to redownload the ISO. With
that in place, after checking the device location of the eMMC chip (it turned
out to be /dev/mmcblk, who’d have thought) and wiping it using dd, I could
copy the image to the eMMC chip, shut down the system, change the physical boot
switch back to using the eMMC chip, and breathe a sigh of relief as everything
started up as expected. Finally, I had a working device.
I hope this rambling was interesting and/or educational. These situations are
never fun when there’s nothing to be done, but when you discover that there’s a
minimal emergency system you can hopefully use to bootstrap things, I find it
can be entertaining to work it out; slowly but surely gaining just a bit more
functionality. If nothing else, you at least get some insight into what comes
included this far “down” in the system and what you can do with it, which might
be useful next time you find yourself in a similar situation. And if you finally
manage restore everything to a working order, that’s just an amazing feeling and
pay-off ^^
Thanks for reading! : )
Thomas Ekström Hansen
PhD student in Computer Science
My interests include information visualisation, formal methods, and low-level programming.