Booting via the UEFI Shell
When it rains it poors, it seems. Roughly a day after my GPG smartcard broke, my laptop decided to start breaking, and quite spectacularly at that:
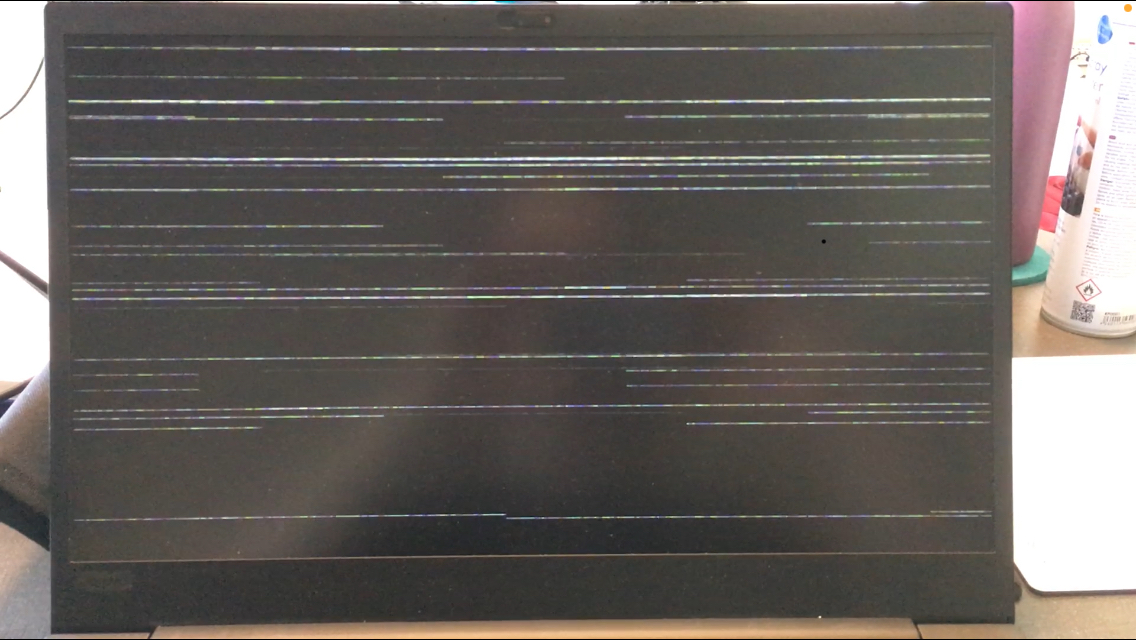
This would happen randomly, within about 1-5 minutes of turning the machine on, so it was very much not usable. Unfortunately, it also was (and still is) the only PC I had access to, so in terms of working from home, this was pretty critical… The laptop itself was only about 2 years old, so definitely too early for that kind of problem, but fortunately also still within warranty! So after calling up Lenovo Support and trying various things to see if they fixed the problem, the guy at the other end eventually decided that replacing the motherboard was probably the easiest solution. (Lenovo support, very excellent by the way. Barely had to wait and the people seemed to know their tech. Don’t know if that applies outside the “Think*” lineup, however: That support option did redirect me to the “business” customer service, which I suspect is their best people. I don’t know if support would have been as good or fast if I’d called regarding a non-Think* product… Anyway!)
Two days later, a new motherboard had been delivered and a technician came by to replace it. I’d already opened the laptop a couple of times, to replace the thermal paste, install a larger secondary SSD, occasionally clear the dust, etc, but there were still a couple of neat things I didn’t know about it. As modern laptops/ultrabooks go, the X1E1 is pretty user-replaceable: The RAM isn’t soldered to the motherboard, nor are the SSDs, the WIFI-card, or the battery. And, it turns out, nor are the USB-A ports! They slide! :D
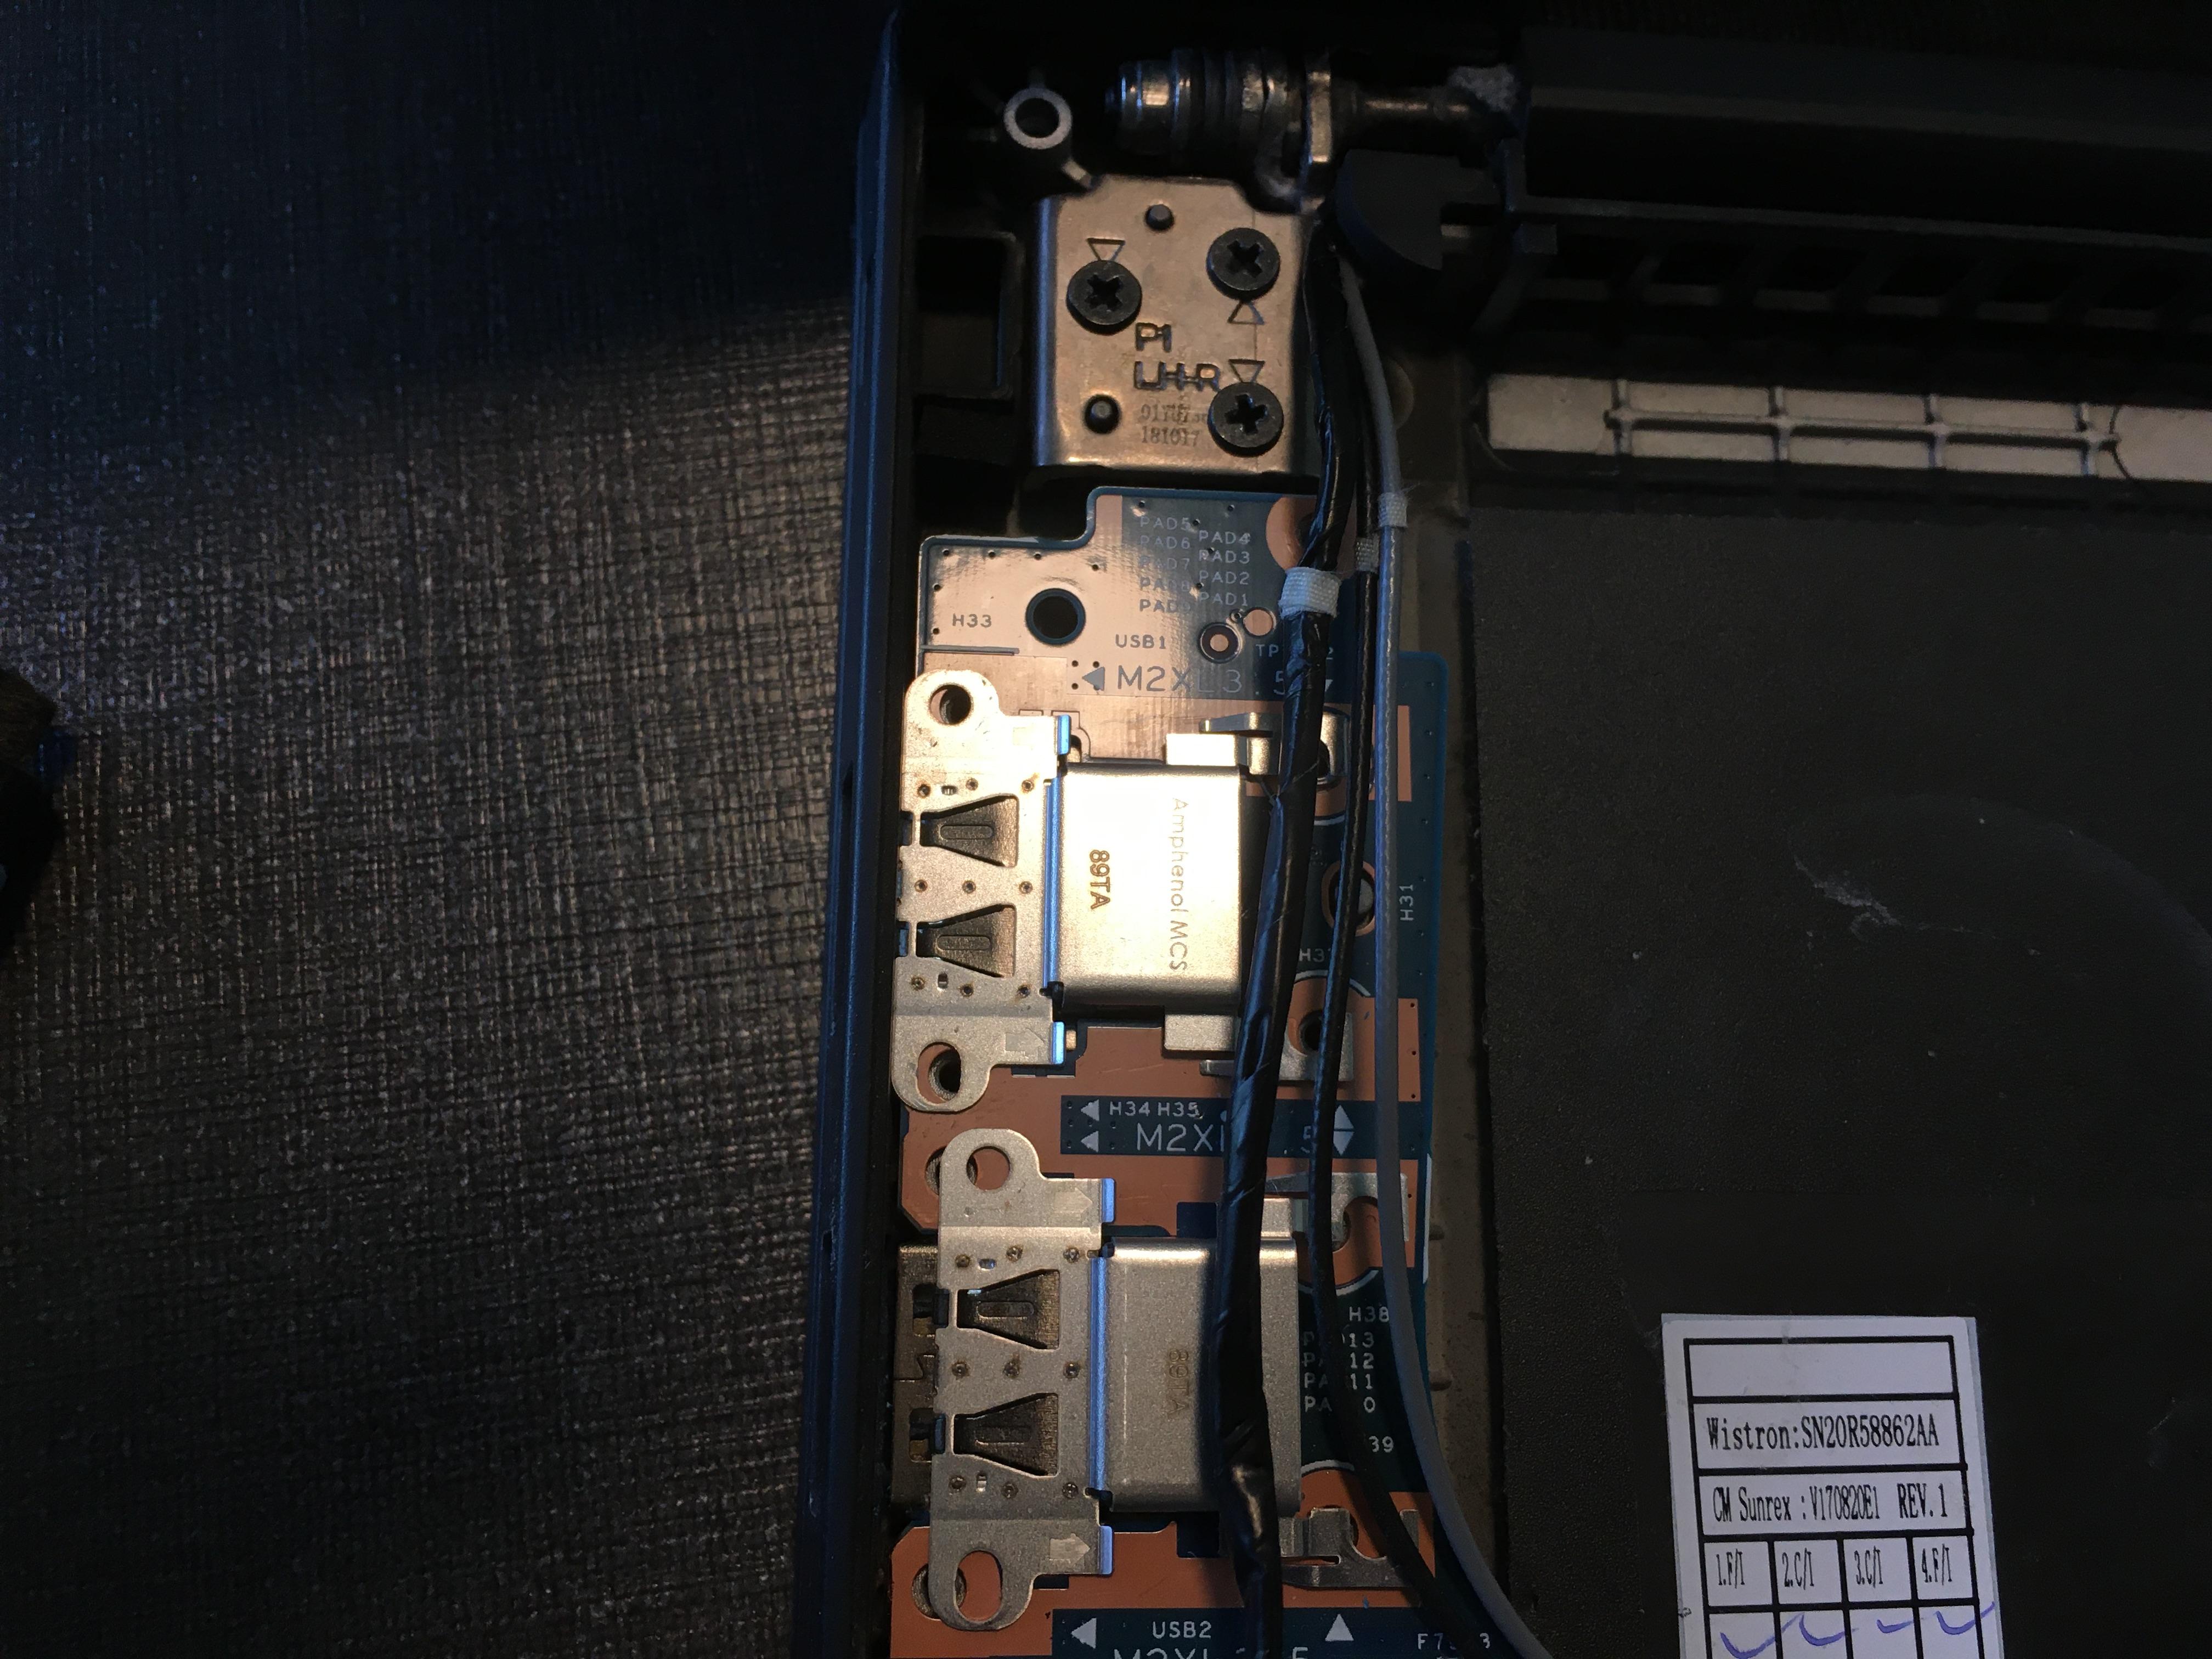
This is what allows to fit the motherboard in there in the first place. Without the sliding USB-A ports, it would be too wide, and the edges too rigid, to fit in the laptop chassis. But not only do they slide, they come off entirely! The ports make contact with springs, so after removing the motherboard from the chassis, they can be removed by simply sliding them off and then transferred to a new motherboard (or replaced on the existing one). That’s pretty cool! Also, I’ll always be amazed at how small the dies of CPUs+GPUs actually are. I think it’s amazing how small we’ve managed to make these incredibly complex and powerful machines ^^
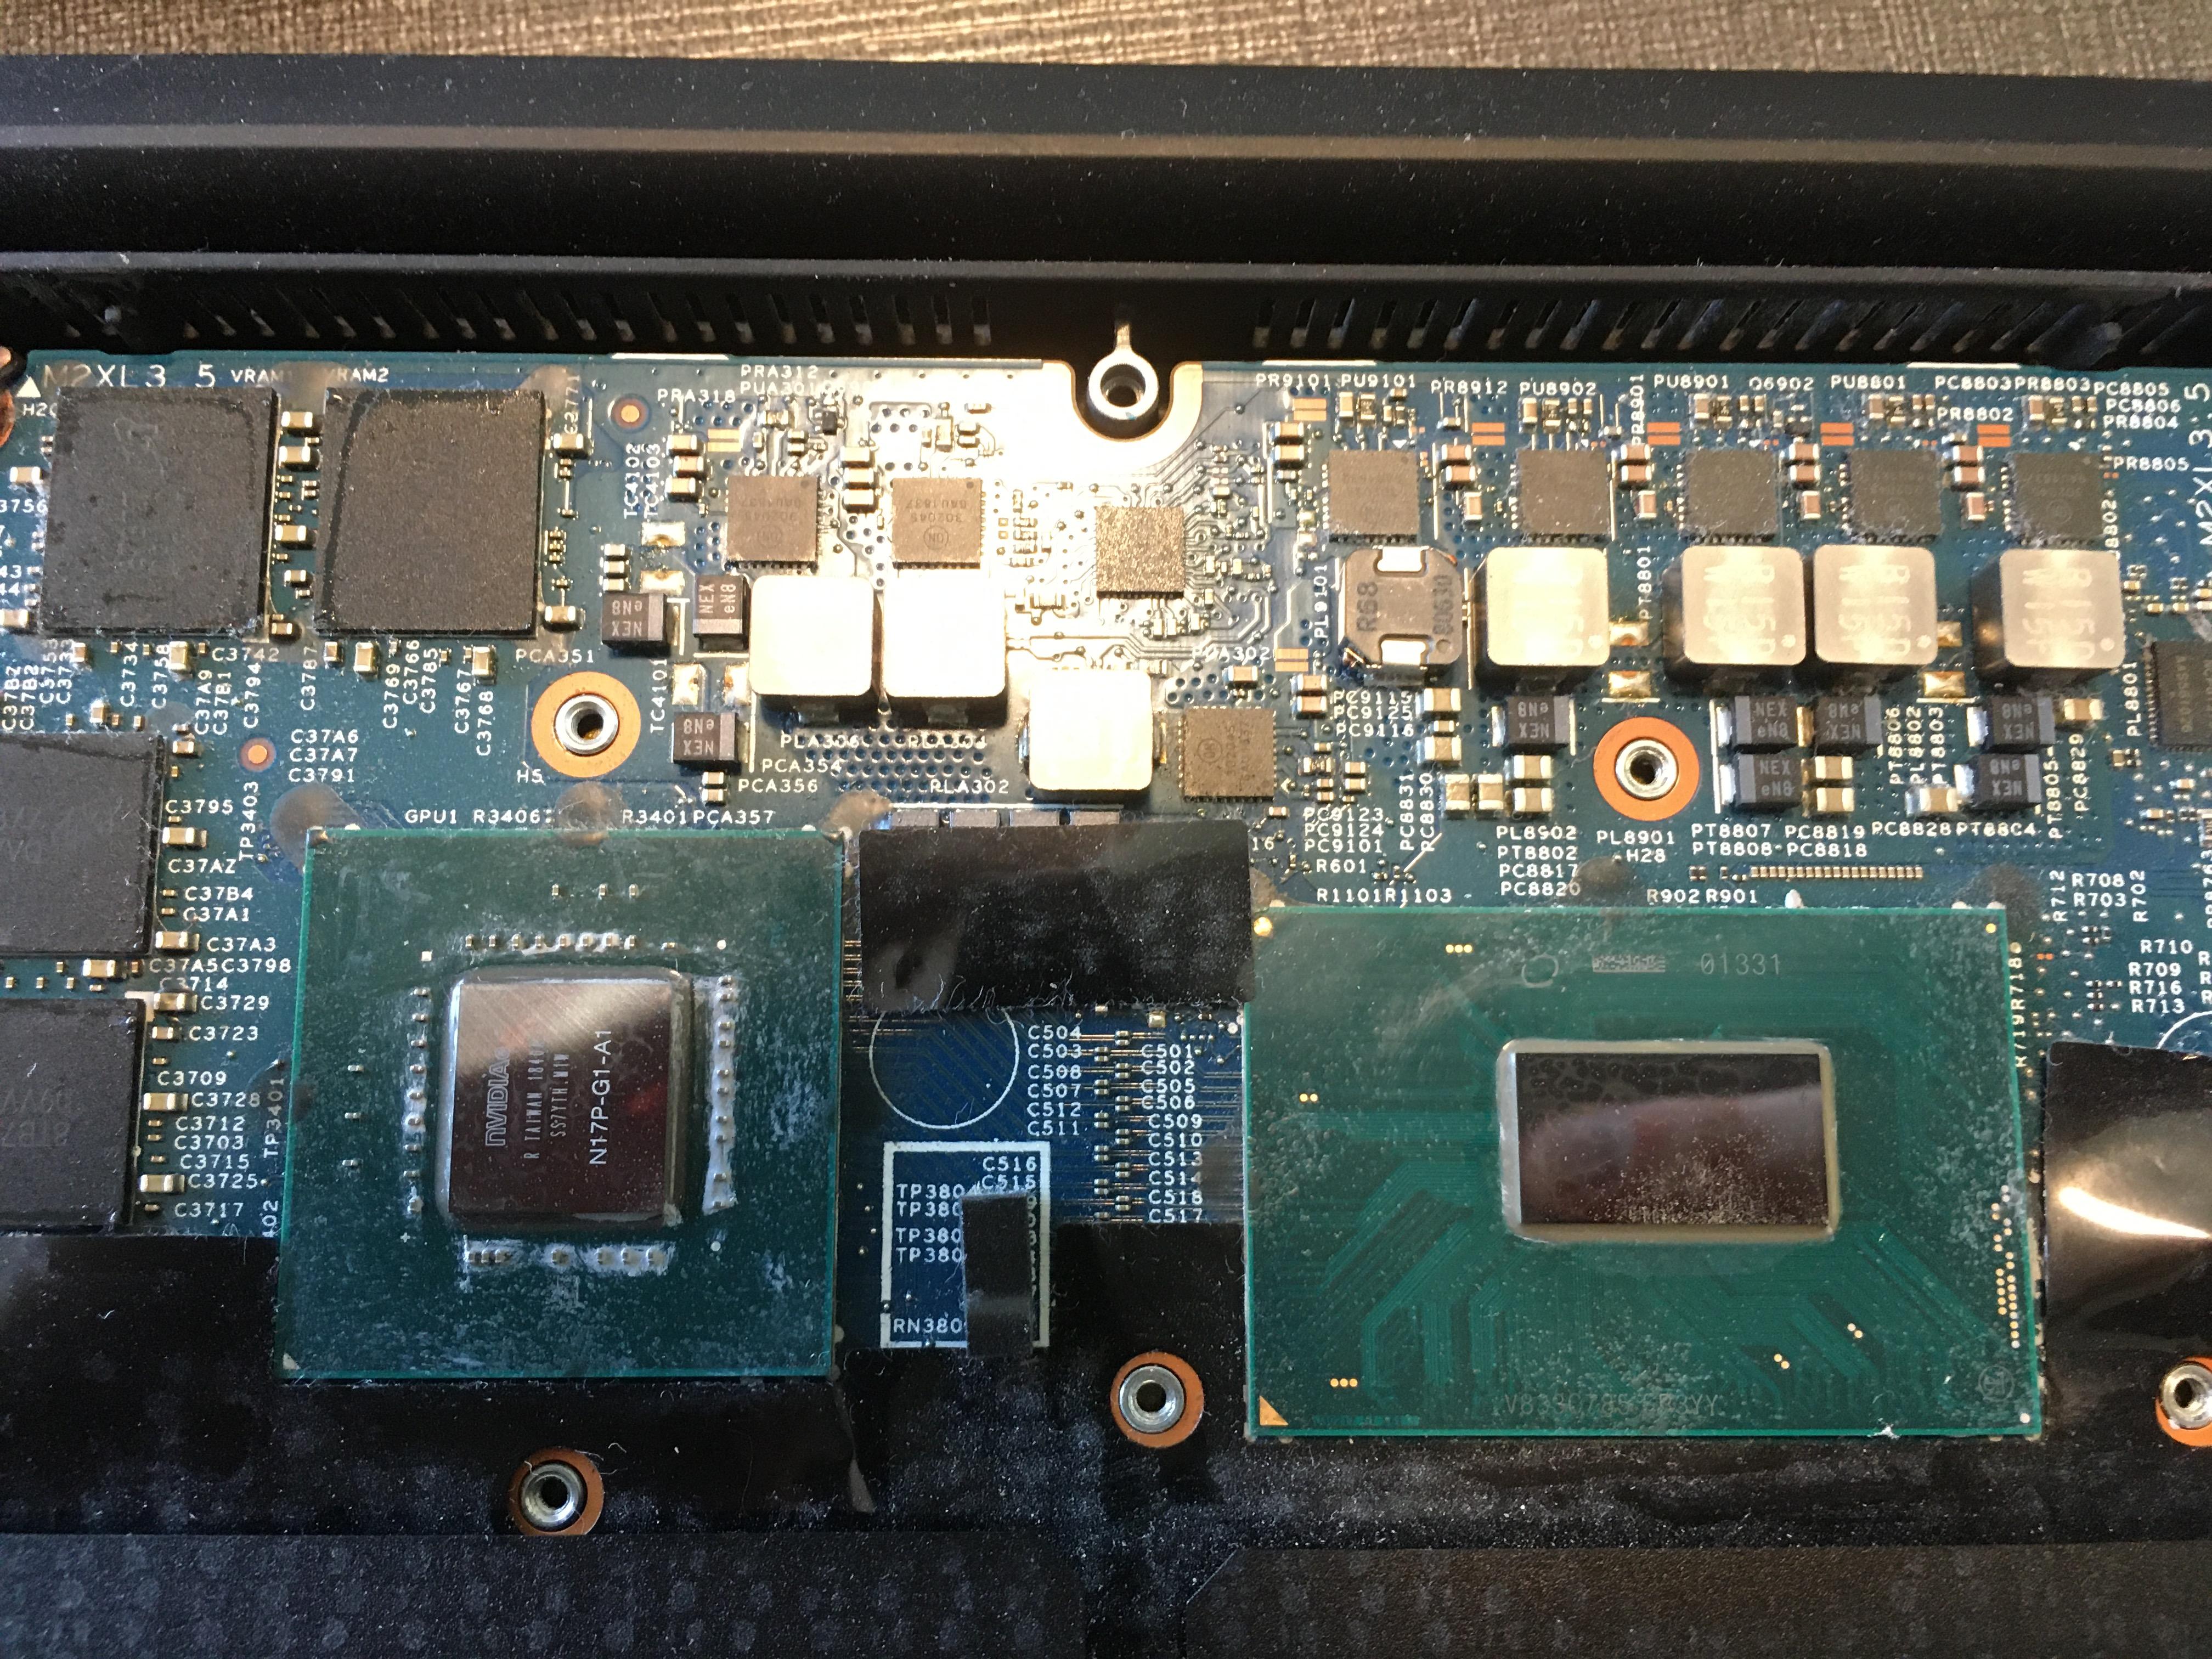
(That’s the old motherboard by the way, the new one did not come with residual thermal paste.)
With the motherboard and RAM replaced (turns out they sent both, just for good measure) everything seemed fixed and booted as normal (the drives were just transferred, so no data was lost). Well, almost as normal: I dual-boot with Linux and use rEFInd as my boot manager, and since everything BIOS-related had been lost with the replacement of the motherboard, so had my boot settings. This meant it defaulted to the first disk, i.e. my Windows installation. Okay, just one more aside: It turns out that another advantage of using VeraCrypt instead of BitLocker for system encryption is that I didn’t need to use any recovery media; the encryption wasn’t bound to the motherboard. Now, I’m sure some people consider that a risk, but I found it pretty nice to just be greeted with the familiar password prompt, as if nothing had changed. Right, that was the last side-track, I promise! Now back to the actual boot manager/UEFI stuff.
The rEFInd install guide for Windows has you change the settings through a
command prompt with Administrator privileges, using the bcdedit command. I
tried this, and it worked once but then decided to not work at all; the
computer would just go straight to Windows. Even though repeated runs of
bcdedit, reboots, and reconfigurations all confirmed that rEFInd should be
the default boot manager, it clearly wasn’t. Time to get a bit more technical.
I have a “victim” USB-drive that I use to flash whichever image/tool I need
onto, so I loaded that up with the latest Arch ISO, initially intending to
manually mount everything and chroot. However, the live-ISO menu presented me
with an option I’d completely forgotten about: the UEFI shell. If you’re not
familiar, UEFI (Unified Extensible Firmware Interface) is a recent-ish
(early/mid 2000s) intended replacement for what is now called “legacy” BIOS
(Basic Input/Output System). Both do similar things, and some people object to
UEFI, but getting into all of that would be a blog post on its own. All you need
to know here is that the UEFI is the new version of the thing that runs before
pretty much anything else on your PC, and that it has a basic command shell
built-in. I had already fiddled around with the UEFI shell on a couple of VMs
before, so I decided I could probably figure things out on the real thing as
well. Now, the UEFI shell is very bare-bones; we’re pre-bootloader here after
all. So the first thing I decided to do was help, since that should give me a
list of commands. And indeed it does, and I got to sit and watch some of them
scroll of the screen as the output was about 1½ screens-worth of text. So, what
do you do when help doesn’t work? Who helps the helper? Well, help does!
Running help help gives you the list of things the help command can do,
including the very useful -b flag: “Displays the help output one screen at a
time.” So, with help -b I could now get a list of commands where I could
actually see the first ones. Having had a look through them, I wrote down a
shortlist of things that might be useful:
devices– Print the device list.bcfg– Display or modify the boot configuration.drivers– Print the driver list.set– Display or modify the UEFI shell environment.setvar– Display or modify a UEFI variable.vol– Display or modify disk volume information.
With this shortlist, I could then run help -b on each of them, e.g. help -b vol. This was useful, because some of them seemed like I definitely didn’t want
to use them after all: The vol page sounded like it was a format tool, and
since I was below OS-level, I didn’t want to mess with anything like that when I
didn’t know exactly what I was doing; I didn’t know if there were any
safeguards this far down, and the changes would likely be immediately
written/persistent. The devices command turned out to be useful, albeit a bit
verbose: It lists the devices… including every USB controller, numerous I/O
controllers, etc. But it does include drives, so there was some useful
information. At this point I decided to have another look through help -b and
stumbled across map: Display or modify a mapping between a user-defined name
and a device handle. In short, it displays the nice, more human-comprehensible
names for things. In combination with it, I found that FS1 was mapped to the
drive with my EFI System Partition (ESP). At this point, I guessed a bit based
on the Windows/DOS command line. Typing FS1:\ changed to that drive! Suddenly,
the prompt read
FS1:\>
instead of
Shell>
From there, a quick ls confirmed that I was in the right place by showing me a
list of files including the EFI directory that I knew rEFInd was installed in.
And then, it was just executing the right EFI executable. Fortunately, the
UEFI-shell has tab-completion.
FS1:\> .\EFI\refind\refind_x64.efi
And so, rEFInd appeared! This allowed me to boot into Linux, where I knew I had
access to the refind-install script. I backed up the configs from /boot just
to be safe, and then I ran the script as root. Turned out the script is somewhat
clever: It detected that there were existing configs, informed me that it wasn’t
going to touch them, and then correctly detected that rEFInd wasn’t an enabled
boot entry and changed it. After rebooting, this time I was finally greeted by
rEFInd and could boot both Windows and Linux. I decided to boot and reboot into
both a couple of times, just to make sure things were persistent, and they
seemed to be. The odd thing was that bcdedit on Windows still showed the same
output, as if nothing had changed. No idea what was up with that… I was just
happy that my laptop was back the way I wanted it set up.
So yeah, that’s one way of getting back into your system when you know the bootloader is there, and you believe the other OS will be able to permanently+correctly configure things, but you also want to play around with the UEFI shell, just to see if that could work. I hope this was somewhat interesting, thanks for reading : )
Thomas Ekström Hansen
PhD student in Computer Science
My interests include information visualisation, formal methods, and low-level programming.